The newest and most unknown to me, the Pure data side to this project was probably the aspect that felt most intimidating. However, over the past weeks my knowledge and confidence surrounding Pd has grown massively, I feel much more competent in using Pd throughout my work, and it is in fact, something I am excited to continue to use and learn.
For this project specifically, I entered with a clear idea of how I wanted to integrate Pd into the work and the effect I wanted it to have, however I had no real understanding of how to make this happen. There were 2 ways in which I approached the Pd, the first was ‘Audio- Working with samples’, swapping out the original sensors on the Bela tutorial for LDRs and putting in my own sample. The other was using the AM synthesis example, using this code as a base but changing it to involve my sample.
After testing each, it was clear the AM synthesis was the way to go as this most caused the effect I wanted it to. I struggled more with the ‘Audio- Working with samples’ code, I got it to work but it was not modulating the amplitude, instead the light was controlling the speed of the track. Im sure there would have been a easy way to change this, however I did try and found myself at a bit of a standstill.
I first used the ‘AM – live input’ code, playing my composition into the input of the Bela from my laptop and running it through modulation using the LDR as sensor. This worked well, and I was changing the frequency to see how different frequencies sounded alongside the sound piece. Once I was happy with the result, I added a second LDR on a separate breadboard, connected to the other. I then played around with giving the separate sensors different frequency values which made for a more interesting sound. This worked well, however the only thing was, that the composition got slightly lost within the modulation, it structure completely left, which I wasn’t surprised when it occurred, however I wasn’t totally pleased with this outcome as it felt it was missing something.
After trying this method and not being totally satisfied with it, I decided to try again, remaining with amplitude modulation, however with a different approach. Instead of a live input, I added the sample straight into the code, which made for a cleaner sound overall as there was much less feedback. As well, I made the sample play separately to the amplitude modulation. The LDRs are still controlling the modulation but of a detached tone that plays alongside the composition. I much preferred this overall sound as the track became a lot more audible, however the modulation was also still clear, actually more, it became a lot easier to hear the direct effect the amount of light had on the sound.
For each LDR I used a different frequency range but the same volume output level, making the modulated sounds quite a bit quieter than the track as they were initially too loud. In the code above, I was also experimenting with a LED on the breadboard too, with the ‘delay 5’ meaning after the first flash of the LED there is a shirt delay and then the composition starts. This was a really useful object to know, and was one I hadn’t previously used.
I feel the Pd code I ended up using reflects my progress of learning Pd since the start of the module, it involves earlier as well as later aspects of the course. Overall, I am happy with the outcome of this project detail and the effect it has, it portrays what I’ve learnt well and has allowed me to progress even more with Pd, picking up new skills that will continue to be useful.
Once I had made this decision to use the turntable, I began thinking about how I am going to present the final piece. For the entirety of this project I have had in mind that the Zoetrope is going to sit on this structure that, internally, contains all of the electronic and audio components, including the; light source, Bela, breadboards- with LDRs, power source and audio output (speaker). This would have still been possible using the turntable base, however changing this aspect of the project made me rethink other parts, like this internal section. Thinking how I could involve shadow more, linking the actual movement of the piece to the images inside the zoetrope.
Thus redesigning the middle layer, moving the internal components to the exterior. Cutting 10 inch wide slits, into a 20 inch long piece of cardboard which I then formed into a cylinder shape that has a base circle (also made of cardboard) which is lodged into the cylinder to ensure the cyclical shape remains constant and even, when rotating. I painted this cylinder with a red exterior for visual aesthetic, and a black interior to create the most dense, defined shadow as the light is not reflected. This structure created a very fun effect, causing a second layer of shutters that influence the sonic characteristics through modulation. As the light flutters, at speed, from light to dark on the LDR it creates a modulation of the music, depending on the Pd code.
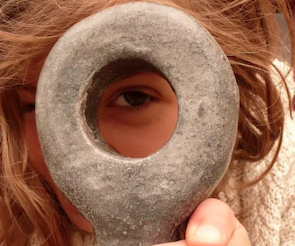
Example of Middle Structure – Using the LDR ‘handmade electronics’ from week one, plugged into my guitar amp, with my sound piece playing alongside. (The music is not being modulated, yet.)
I think this adaptation gives context to the piece, it plays with manipulation, creating a deeper connection between both the sonic and visual elements.
Due to this design change I had to reorganise the placement of components, moving them externally, which made the piece look less clean as the wires and components are now all visible. However I did not mind this more ‘messy’ design as I actually really like the visual aesthetic of the breadboards, patch cables and the components. They make it much more intriguing to look at.
Having the components on the exterior does also make it simpler for connection and audio output, I am able to use a better quality of speaker, as previously I was going to have to use a wireless speaker which does not have the best audio quality. Now I am able to use the output from the Bela to connect it to a good pair of stereo speakers. This makes a huge difference to how the project is perceived as the whole piece is centred around sound and so it is incredibly important this element is defined.
As this project nears completion, I am now considering how to present the work for the hand in, I need to document it in a way that I can present digitally, however that still captures what the human eye sees. I have a feeling this is going to be a bit of a challenge due to the struggles I have already faced in trying to capture the visuals of the zoetrope. This is due to the difference in frame rates, as well as the poor, up close focus ability of my phones camera. To bypass this issue I am going to record the final video on a more professional camera that has the ability to focus up close and adjust the exposure levels as this will help to show to true effect. Regarding the frame rate, this will still be an issue as the frame rate of cameras are much faster, however the moving image will still be visible, and I will choose the frame rate that best captures the movement.
At this point in time I am happy with where I am in the project, I feel I have made changes that overall better the work, adding deeper layers to the visual and sonic details.
To begin with the construction of the zoetrope structure I first designed the outer cylinder, a 30 inch longer piece of card, in which I cut 15 slits into, each 2 inches wide. This was the most crucial part of making the moving image work as the width and placement of the slits determine how the motion is perceived. In order to achieve the desired effect, I had to meticulously sketch out the slits before cutting, alining the centre of each image with the centre of each slit. This involved measuring the width of each frame, (which I already knew as I designed them to be 2 inches/ 50.8mm wide) finding the middle section of that measurement (25.4mm) and then marking each point out on paper. Every midpoint was 2 inches/ 50.8mm apart from the next.
When it came to the width of the slits I first had to do a bit of research to determine how wide they needed to be in order for the motion to work, whilst still having the right balance of lighting and clarity for the images to be seen. There were sources online to suggest 1/8th of the frame width would be a suitable width for the slit, 50.8 ÷ 8 = 6.35mm wide. However, when looking into traditional designs, there sources saying the slits shouldn’t be any wider than 4mm as this would make for a sequence that is too choppy. Because of this, I felt concerned that if I did make the slits 6mm wide it wouldn’t work, therefore I decided on 4mm wide for each slit.
I feel happy with this slit width as it does work well with the images, it creates an incredibly smooth motion of the wolf moving which is the result I wanted it to have. However I am questioning whether a 6mm wide slit would make for a more defined image as I feel currently, the shadow image itself is obvious to see, but the hands less so. Im not sure whether this is because they’re a more fine-line drawing and therefore do not have the darker contrast needed for the eye to see at speed, or whether it’s because the slits are too skinny, therefore not allowing enough time in each shutter for the brain to properly pick up on what it’s seeing. I am going to continue working with these 4mm slits for now, adding elements I know will help to define the image, however if toward the end I am still not completely satisfied with the result, I will make a second external cylinder with 6mm wide slits.
First Prototype –
After cutting out each slit, I made a first prototype, blue tacking both the inner and outer cylinder into the circle shape and placing them on top of a record playing at 45 rpm on the turntable. I knew that the 45 rpm speed would work for this project as when beginning to research how to create the motorised base for the zoetrope I looked into rotation speeds. For this zoetrope, with 15 images, it needs to rotate roughly at 10- 15 fps (40 -60 rpm), meaning the speed of the turntable at 45 rpm works well, however 60 rpm does make for a smoother motion.
In the video above, it doesn’t quite capture the effect that the human eye does as the frame rate of the phone is different to the frame rate of the zoetrope. Additionally, the whiteness of the outer cylinder doesn’t create enough contrast between the flicker of each image so it all starts to blur together. However, you can still see the desired affect, just not with much clarity or to it’s full extent.
In order to combat this lack of contrast, I painted the outer cylinder black using acrylic paint. I painted both sides of this external cylinder, meaning that when it rotates the only white you see is the internal strip of images. The quick shutters of black help direct your eye to the images, making them appear brighter and therefore clearer.
Second Prototype –
When comparing this video to the first, there is a clear difference between the results and the contrast of the black makes for a huge improvement of motion. However there is still the issue of recording this motion due to the frame rate difference and also my phones lack of ability to focus up close.
Playing Alongside an Existing Record –
Once I had completed this second prototype that I felt happy with, I began thinking about the more mechanical aspect of the rotating base layer. Originally, going into this project I wanted to create the entire structure from scratch, making a rotating platform that the zoetrope sits on. I planned to motorise this base using the Bela board. However as this project has moved forward I am beginning to rethink this idea due to both practical and technical reasons.
First of all, the task of building the base is intense, it is a lot of new work that I haven’t done before, specifically working with motors using the Bela as this is something we have not touched on in class. I did however, feel excited and enthusiastic to work in unknown territory and learn new skills that will continue to come in handy for my practice. However, as time goes on I am realising this might have been too ambitious for this project, as not only is this aspect new to my practice, so is Pure data and using the Bela. With 2 weeks left until the deadline, I still have the Pd aspect of the work to navigate, as well as finishing the construction of the zoetrope and completing the written work. And so, I just feel, in order to complete all the aspects to a high quality, I need to prioritise the ones that have no alternate option like the Pd code to ensure everything gets done.
Furthermore, after finding out the rotation speed of a record player works for this project, I did question whether I should just use this as my base and create a structure that is able to attach onto the turntable. It is an incredibly polished design that is made to rotate at even speed with a stable motor and good balance, all the aspects I need to create a smooth flowing moving image.
Therefore I have made the executive decision to use a record player as the turntable for this project, creating a structure that will sit on top. I feel this gives me more time to focus on the important aspect of the technicalities, including; the Pd code, the placement of the LDRs, the light set up and sound quality. Additionally it ensures that the zoetrope will actually work as it is the right speed of rotation, moving on an even balanced surface with a reliable motor source.
The musical aspect of this project accompanies the Pd and circuitry work, integrating the piece as a sample into Pd and then using the LDRs in relation to the LED flicker, in order to modulate the amplitude of the sample during the rotation of the Zoetrope. I wanted to create a soundscape that represents each aspect of the project, creating an atmosphere that holds meaning both to myself and to each individual viewer. In order to achieve this affect I have used a range of sound sources including; wolf howls, a female speaking voice, my own singing, humming and whistling, guitar plucking and more.
Final Composition –
Because I was aware that the piece itself would have this modulation occurring whilst playing out, I didn’t want to create an overly complex soundscape that when modulated would just be too much sonically in comparison to the visuals. However, at the same time I didn’t want to create a boring piece that wouldn’t captivate the viewer. Overall, I feel I have managed to create a balanced piece that holds beauty and meaning without much complexity, hopefully reacting well to the modulation. The sources I have used are coherent enough to work well together, whilst still standing out from one another, you’re able to distinguish the different sounds of the wolf howling and the voice speaking for example, yet they also subconsciously merge into one harmonious sound.
The music/soundscape was the most underdeveloped part (in terms of planning) of this project, making music using a DAW is something I am pretty familiar with and so compared to the other aspects of this project, I felt most confident entering it without much prior thought as to how to make it. Previously, my projects in the first year were mainly audio file based and so the entirety of the project revolved around making a piece of sound work on my computer. I would put a lot of thought into the piece before starting it and found that this never really worked for me, often times, my expectations would not match the reality of the piece and this discouraged me from this form of sonic expression, feeling this way of working was not suited to me. However, since last year I have approached my practice with a different mindset, conforming less to this structured idea I had of working with sound and music, and allowing myself to explore freely, using the kind of mediums I am interested in. Intertwining each medium with another to create new work. And so, when it came to making the sound piece for this project, I had a vague idea of how I wanted it to sound, however I did not have a solid aim for the work. This approach worked incredibly well, I ended up making a piece that; suits the theme of the illustrations, works well as a loop, has a range of different but coherent sources, and only took me 2 days to make.
Composition In Progress –
For this composition I chose to only include sources that were made from a natural source, therefore no synthetic or computerised instruments were used to create this piece. The choice for these natural sounds arose from wanting an organic feel to emerge from the music and the visuals, to then contrast the rather inorganic, technical work that goes into the Pd and circuitry aspect. I wanted to create this contrasting relationship for a few reasons; first of all I was massively inspired by Milos work that I have previously mentioned, second of all, I wanted to represent the misinformed relationship humans have with animals. We, as humans, often separate ourselves from the rest of the animal kingdom due to lifestyle and the society we have evolved into, however at the root of it all, we are all just animals existing within the same world, together.
Each track involved with this piece, apart from the wolves howling and the speaking voices, were recorded in through my laptop microphone, which I then added effects to, the 3 main effects used were reverb, echo and delay. – Although I am aware of the low quality of a laptop microphone, it was a conscious choice as I found it worked well for this project, I was using other sources that were old, low quality recordings, and this meant that all the recordings worked well together and one did stood out from the other quality wise.
The most influential effect I used, that really shaped the whole piece, was the Delay Designer, an effect I haven’t previously used. Using this delay effect allowed me to manipulate sounds that were once very mono and boring and transform them into deeper, more complex sounding sources that took on new meaning. I was able to create these rather intense, actually inorganic sounding noises, by applying layers of delay onto one sound, gradually eroding it’s natural texture and creating a new sense of rhythm. Contrastingly, I was also able to transform particular sources to sound more organic and part of a natural soundscape that they have no distinct sonic correlation to. For example the drumming is the sound of my phone hitting the base of my guitar, in which through the delay, transformed into this rather tribal, ancient drum sound and rhythm.
Sound Sources –
The sound sources I used for the piece were very selective and specific for this work, once I began making the composition, I had this realisation that I wanted every source to be a natural, organic sound in which I then manipulated to my liking. This started as first I began singing tones into the microphone with this delay effect on and they sounded so dense, these really beautiful layers of harmonies and tones arose just from me singing one note. I played with a few different tones, seeing which worked together and then began making other noises like whistles and hums, all of which are included in the final piece. These sounds felt connected to the project due to the kind of fluidity they held, this piece works with movement, – the rotation of the cylinders, the flickering of the light, the modulation of the music. And so, these loose organic sounds felt right to accompany the visuals, the tones are constantly changing and moving due to the delay and this creates (along with the other aspects) a kinetic atmosphere. The other attraction to these tones is due to the similarities they have to the sound of howling. The layers make it sound as if there are multiple voices at once, each vocalising a slightly different tone that equates to this one connected sound.
The Tones –
I see this piece centred around communication, and the forms it takes throughout lives. This concept first came from thinking about the howl of a wolf, questioning it’s purpose and what the human equivalent is to a howl.
The howl is a collective form of communication used in a functional way to; assemble the pack, find a lost member and defend territories, however it is also used in a more emotional way to greet pack mates and mourn a lost member. The human equivalent is talking really, and although this takes it form in different ways for different effects, e.g shouting when angry or to be heard, this is our comparable form of communication. Therefore I thought it was important to include speech within my composition, to accompany the sounds of howling, which occur more in the background of the piece.
The sources I selected for the speech were from a childhood camera I recently found that had an array of recordings from around 2009/10. Using these recordings added another layer of nostalgia and relation to this project as they’re incredibly personal recordings.
The first voice you hear is actually my mother’s, talking to me as a child as I am trying to stroke some horses on a farm we used to go to a lot. I chose to include this specific recording as this whole project relates to my own memories of being a kid. As mentioned, wolves hold a significance to my younger self and so I felt it was important to portray this relation through the project, even if not noticeable to the viewer, it was important to me.
The second voice, that appears at the end is also from a recording on the camera, however it is a man voice coming from the radio of my parent’s car. The speaker of this sound has less importance than the last, instead it is more about what he is saying; “We live in a state of perpetual fear really.” My choice in this source relates to this idea of ‘fear’ and how my perception of the wolf began and influenced me. My fear of wolves was totally irrational, however, irrationality doesn’t really exist to a child and so to young me, it was a very real concern. All of which was caused by a 3 little pigs episode of Button Moon, a 80’s tv programme I loved as a kid.
My choice to repeat the phrase in the composition came from firstly, this idea of perpetual fear, as if it’s never ending, I wanted to create this brief effect of being stuck in a loop, sonically, to match the cyclical repetition of the zoetrope. The other reason I chose to repeat the voice was because as I started making this composition, thinking about my connection to it, I was reminded of a reoccurring nightmare I used to have when I was around 6 years old. A wolf would chase my down these incredibly long paths that were carved out into some kind of sandy soil, it was happening underground but my perspective was as if I could see all the elaborate channels and paths to take, like looking into an ant farm. I can’t remember if the wolf every did manage to catch me. But I felt it significant to represent this in the work.
There was on other source that I used from these found videos, it was of my sisters year 6 school disco, in which she had filmed a final dance battle between 2 kids and everyone was screaming. I took this scream and chose to include it in the composition as I wanted to include one more form of human communication, that wasn’t talking. I also thought that this collective scream felt similar to a howl, it is a community of emotion, being expressed through a form of communication that isn’t traditionally associated with fun. I first took this scream and put it in as a raw, unedited sound as I wanted it to be heard, however it stood out too much from the rest of the piece. Instead I chose to time stretch it and formed it into an entirely new sound that no longer appears to be screaming but still captures the kind of eery, atmospheric feeling that a scream does. This really helped in characterising a section of the piece, as to pair with this source I put in some guitar notes that sounded particular ominous. I wanted to create a part of the composition that felt more sinister and off putting to represent my fear once affiliated with wolves.
For the howling of the wolves I used recordings I found on Youtube, both from the ‘Wolf Conservation Center’ channel. I listened to quite a few different recordings that this channel had up, and these were the two I felt most drawn to.
The first one because it involves the howls of 25 wolves together and I felt this really highlighted the power in the collective use of the howl.
And the second because this very alluring, rather elegant symphony of howls occurred. I was also attracted to the bird sounds in the second one as well, as it just adds another layer of organic properties to the piece.
I found each recording to be different enough from the other, in order to hold their character in the composition whilst still sounding good together. The first recording has more lower end howls, where as the second has the higher pitch noises that both compliment each other and can be heard through the soundscape.
The sounds of the wolves sits more subtly in the background of the piece as I didn’t want it to be the main focus, this felt cliche and too obvious to me. I did however still want to include the sounds of howls to signify the sound itself and my choice of animal for the shadow puppets. Therefore I chose to have it as this background noise that fades in and out as other sections change in amplitude. I think this works really well as it focuses the listener in without spelling out exactly what they’re hearing.
Overall I am happy with how this composition came out, I think it accompanies the project as a whole really well, holding all the information I wanted it to. It is crucial in creating the atmosphere of this project and I think my choice of sounds help cause the effect I intended this piece to have on a listener. It feels emotional and evocative whilst having a good rhythm and including context to the visuals. The next step is to see how it reacts with the modulation from the light.
In order to create a smooth flowing moving image, every image has to be sequential from the last, each only differing to a slight extent in order for the continuity to remain and for the movement of the subject to be visible to the viewer. On average, zoetropes have an image count of between 10-20, depending on the overall circumference of the cylinder. The number of frames in relation to the size of the zoetrope has to match the speed in which the human eye and brain can take in and process each individual image whilst still being able to merge them into one motion. When you view an image, it stays in your retina for roughly 1/15 to 1/20 of a second, therefore if another image appears quickly enough after the first, your brain blends them together instead of seeing two separate pictures. This illusion of continuous motion starts to occur when images are shown at around 10–12 frames per second, therefore the speed of rotation alongside the number of frames are crucial for the zoetrope to have the desired effect.
Dimensions – For my zoetrope I have decided to make the circumference of the cylinder 28 inches as I felt this was big enough to fit a nice amount of images inside, as well as leave space for the light in the middle, all without being too large and therefore making it more do-able in time for the deadline. To accompany this size, I have chosen to include 14 frames, giving the space of 2 inches per frame, I feel this is a good amount of images as it is enough to create the motion effect whilst still having a nice amount of space per frame to draw out the illustrations.
This allocates 4-5 frames per category of movement; looking up, looking down, and howling. If when I begin the drawings (which will likely be tomorrow) and I find this amount is too little to fit the movements in, I will adjust by adding more frames and possibly changing the motion of the wolf. In order for this to work, I want 12–16 images to flash per second. So if there are 14 images that’s roughly;
12–16 flashes per sec ÷ 14 images per rotation = 0.86–1.14 rotations per second.
This averages out to about 1 rotation per second which I feel is a really stable rotation time, that can likely be achieved by hand as well as using a motor.
Rough draft of motion (not in proportion) –
As I have mentioned previously, the illustrations for the animation are going to be hand shadow puppets depicting a wolf figure that’s movements involve looking up, looking down, and howling. I thought this was an even balance of complexity and simplicity that would work well for the zoetrope whilst still showing an image that holds beauty and meaning. I think wolves are very intriguing animals, they are so similar to the domesticated dog, yet a humans approach to a wolf is entirely different and far away from how we see a dog. I feel wolves hold this mystery to them, a kind of mystery that I find rather intimidating, as I said in another post, wolves were my biggest fear as a child and although I no longer feel this way, it has definitely left an impression on my perception of them. For a long time, wolves have been painted as wild, deadly animals, they’re creatures of myth and folklore. However in reality wolves are very intelligent animals, who are incredibly social beings, they develop these specially close bonds within their packs, which in a way makes me feel wolves and humans are actually quite similar in our approach to life.
In order to accurately depict the motions of this shadow puppet, I thought it would be helpful to first record a video of both the shadow itself making the motions, as well as the shape of the hand making the shadow. I thought this would be useful when drawing out the images as I now have a reference frame for each movement that I can base my drawings off of. Below are these said videos :
Video example of shadow movement –
Shaping of the hand –
I will use both these videos along side some existing images online to create the drawings for the animation, as I found it hard to capture all angles of the shadow when recording. I have dedicated tomorrow for drawing the images, I am going to be drawing on a piece of thick card/ paper that is roughly 28 inches length wise and around 5 inches in height. Dedicating 2 inches per frame, I will first mark out roughly what I want each frame to depict, this is so I know before committing that I have enough frames to achieve the motions I have in mind. I am however going in, ready to adapt for change as this is my first time making a zoetrope and so it will at first be a bit of trial and error. With this interior section, my idea is that the card/paper I will be using to draw on will bend around into the circular shape which I can then slot into cylinder. This concept came from when researching zoetropes, I saw multiple examples of the zoetrope as a toy, in which it had interchangeable interior cylinders, each with different illustrations on them.
FINAL DRAWINGS.
These are the final drawings, a collection of 15 sequential images, each 2 inches wide and 5 inches tall, totalling 30 inches length, using a piece of A1 thick white paper. As you can tell, my original plan of 14 images and a circumference of 28 inches had to be slightly increased, which was due to needing one more image to complete the animation. This however, did not come as a surprise to me (like I previously mentioned) as going in I expected there to be changes and challenges that required spontaneity in response to the creation of the final product.
I feel very happy with the final result, each illustration has a slight difference from the last, and although this wasn’t necessarily the desired effect, I feel these moderate impurities make for a very natural looking movement. This is because the image is depicting a shadow puppet, an image, that in real life is constantly changing due to the imperfection of human movement. If I was portraying a different sequence, like a ball bouncing for example, I would be frustrated if each frame had a slightly different shaped ball as this is not a natural occurrence. Despite the variation in drawings, I was very meticulous with the measurements and placements of each frame, every image started 0.6cm in from the left and 0.5cm from the right, and along side I made sure the height of each image matched, this was to ensure that when the zoetrope spins, every image appears through the slits in the same place as the last making for the desired smooth effect of the moving image. As you can see from the last picture above, this method worked and every image appears to be a continual location.
One other aspect that I did change was the actual illustration itself, differing from my draft drawings, I changed it from one hand to two. Before beginning the drawings I saw an image of somebody making the shadow puppet using two hands and I felt this was a more realistic looking hand movement, I also preferred the shape of wolf the shadow it made. For the reference I still used my draft drawings, however adding an extra thumb and finger which I first took reference from the image I found of the two handed puppet. I am very happy with this decision to change the image as I feel it made for a much more precise and defined final image.
The moving image aspect of the zoetrope was one of the most important for me to get right, otherwise my whole idea would not work. The effect revolves around the images, even when it comes to the sound work as this is all going to be related to the drawings and the final animation. This did put a pressure onto the illustrative process, requiring an accurate portrayal of the design I intended going into the project, however, I am very pleased with the outcome and I feel it does accurately represent my initial conception.
A zoetrope is an early (pre-film) form of animation, introduced in 1834 by English mathematician, William Horner, originally called the Daedalum, his designs were based on the phenakistoscope.- An even earlier form of animation that uses spinning discs with a series of continuous images to create the illusion of motion. The zoetrope gained commercial success in the 1860’s when the term was patented by an American man William E. Lincoln, who designated the patent to toy company Milton Bradley.
The zoetrope is a cylinder composed of 2 main parts, the outer cylinder is composed of narrow slits that look into the internal section. In this internal section is a second cylinder with a sequence of around 10-20 images, portraying a progressive motion, meaning when spun it creates a smooth flowing moving image. In order to accurately achieve this effect is where the slits on the outer cylinder come into play. These slits act as a shutter does on a camera, as you look through them, they isolate each image allowing the necessary time needed for the eye and brain to process each image as a separate visual, instead of merging them together into a continuous blur. The retina retains an image for around a tenth of a second, and so as the cylinder rotates, each slit allows for a new image to appear in that time, meaning the brain is able to create this one seamless moving image.
Milton Bradley set ”Zoetrope Pictures series No. 1”
Étienne-Jules Marey– One early artist who involved himself with the zoetrope was Étienne-Jules Marey, a French physiologist who in later years began working with film and photography to pursue and develop upon his findings within prior scientific works. Marey’s main goal throughout his lifetime was to focus on movement, whether that be movement of humans, animals, objects, fluids, anything capable of it. His first development within this subject matter was his “Graphic Method”, a system for studying and recording the invisible motions of bodies (human and animal) by transcribing them into visible graphic traces. This method was designed to visualise what the human eye cannot perceive, for example, a pulse. Marey’s technique was a crucial foundation, in which transformed the study of motion itself, helping develop pivotal technologies that are still used today, including; medical imaging (like the cardiograph), cinema, and, sound recording + playback (the phonograph). Muray’s work quickly developed following the discovery of this method, continuing to research into the movement of many different animals, from insects to birds to horses. English photographer Eadweard Muybridge’s famous galloping horse photos taken in 1878, was what persuaded Marey to begin exploring photography.
Marey designed numerous cameras, each with the intention of being able to most clearly capture the movements of the subject. He ended up building a rather powerful camera with a glass plate that used the chronophotography technique (a technique that captures a series of images of a moving subject over a short period of time, combining them into one single image that shows the phases of motion). These images were very clean, crisp and are rather beautiful as they’re so simple yet so intriguing. Like most of Marey’s work, these chronophotographs were incredibly influential in both the scientific world as well as the art world.
In regards to his involvement with the zoetrope, Marey created a 3D version of the original concept, replacing the 2D images with small plaster sculptures of a bird through flight. These sculptures were based off of a chronophotographic study he had done of a pigeon. Through creating these 3D structures of the birds in flight, he was able to delve into each separate motion that occurred during the movement. Not only was this useful for his own knowledge and studies, but it also allowed him to produce this visually compelling demonstration of the rapid movements that are too fast for the human eye to fully process in real time.
Prior to researching zoetropes, I have come across Étienne-Jules Marey’s work before, admiring the beauty of it, as although it was initially a rather scientific approach to understanding, there has always been this beauty and artistic aspect to it. There is something very captivating about movement, I think due to this fact that as humans we are unable to fully process these fast pace motions without aid, and so being able to visualise each distinct and detailed aspect to it is incredibly enlightening. We’re breaking down the once unknown, although we know what the movement is and have an understanding of what we’re seeing in real time, being able to dissect it to it’s simplest form allows us as to really appreciate the intricate patterns and rhythms that make up our world.
Going into this module assignment I knew I wanted to combine my knowledge and skills within sound work with my interest in mixed media to create a piece of work that is drastically different in regards to my previous works involving sound and music. I feel since starting my second year I have really involved myself in this module, majorly enjoying learning an entirely new medium that has changed my perception on my own practice. Throughout the last year I have felt quite lost within my work, questioning whether or not this approach to sonic art is even right for me, this has been due to not really being able to define my practice, which I still can’t really do. However, since being able to refine my skills within this module, learning a new form of sonic work that not only involves technical work on the computer, but also practical work with my hands, I feel much more confident in my own abilities and my choice to study this course. Although I am unsure where I want to go with this in the future, I currently feel very inspired in working with Pd and circuitry, and as of now thats what is important to me, -feeling inspired in the moment and enthusiastic to progress in my learning.
When it came to choosing the elective for this assignment, I first felt gravitated toward ‘Sound for Screen’ mainly due to my familiarity within the practice. Coming from a film background, I have worked on sound for film before, both foley and scoring, and although I really do enjoy this kind of work, I felt I wasn’t really going to gain a lot of new information through choosing it for my project. I also felt discouraged from this project on account of the fact I would be creating a soundtrack to an existing film that was not my own work. This put me off as I feel it is important now, that the work I am creating for university is work I am also making for myself, original works that I can add to my portfolio. Although I would come away from the project with a soundtrack that is entirely mine, it is made in conjunction with the film and therefore I feel can’t really be taken as a separate piece and still have the same effect. Whereas, not only is the work I will be creating for this project (having chosen Expanded Studio Practice) going to be an original piece, it is also something new and a way or creating I have never experimented with before, because of this I feel much more motivated to create a high quality piece of work. This module also allows for more freedom within my practice, meaning I am able to intertwine my different interests in film, illustration and sound, making for what I feel will be an interesting piece of work.
My Idea.
Entering the planning process for this project, I had a vague idea of what I wanted to make, acknowledging I wanted to produce a physical piece of work that involved both the Pd sound work and some kind of structural artwork. However, I also felt pulled toward working around film too, due to my general passion for film. I couldn’t quite make a final decision and found myself fluttering back and forth between the two concepts, then I had the nice idea of combining the two. Creating a physical piece of work that somehow can be made into a short film work, whether that be animation, real world or something entirely different. After a few different ideas I decided on creating a zoetrope, an old form of animation using a rotating cylinder with sequential illustrations on the interior, along side an exterior compiled of slits that when looked through, the spinning images become one smooth flowing moving scene. I felt this matched the criteria I had set myself for this project and I immediately had a interesting concept for integrating my Pd sound work into the zoetrope.
( ↓ Planning in sketchbook. )
As mentioned in the pages above my idea for incorporating the Pd and circuitry work involves seeing the zoetrope structure as a lampshade like object, placing a light bulb (most likely an LED) into the middle of the cylinders. The reason for this is, I will then place LDRs around the base structure of the zoetrope, surrounding the lightbulb which will be connected into the Bela board running into Pd where I will have some kind of soundscape being produced. I am planning to code the LED to flash at a certain pace to match the rotation speed of the zoetrope, this flashing will then trigger the LDRs to create this fluttering effect which will modulate the original soundscape. I am currently unsure on how I want the zoetrope to rotate, I ideally, would like the Bela to power a motor which moves the cylinders round at an even, steady pace, however I need to research into whether that will be possible in the time frame I have until the hand in.
In regards to the drawings inside the zoetrope that are going to make up the animation, these will all be original designs and illustrations. I, at first, thought about drawing some kind of human character that’s movement was breathing deeply in and out, which I would then create some inorganic sounds to accompany this very organic motion. However I changed my mind as I feel this would be quite an intricate design that, first of all would take a while for me to draw out and second of all, might have been difficult for the eye to see detail at the speed at which it moves, therefore I would be spending time on these intricacies that wouldn’t even be visible. Instead I thought about what I could draw that not only has meaning to me, but also links to components being used internally, I began thinking specifically about the light aspect and this concept of the lampshade. From this the shadow puppet idea formed, a nostalgic, simple yet rather pretty image. I finalised the animal as the wolf, an animal I have always had an odd association with, wolves being my biggest fear as a child. I thought this added a nice personal aspect to the project.
I felt very inspired by a piece of work that Milo had made and shown us, a Mexican garden in which he created this entire ‘natural’ soundscape using Pure data, made up of this ecosystem of Mexico’s natural landscape. I really liked this concept of creating these unnatural, natural sounds (which are so accurate to the noises they’re imitating) by using code made on a computer, something as far away from the original sound source as you can get really. I felt inspired by this idea of organic vs inorganic forms and felt I wanted to incorporate this into my project somehow. Thus this idea of depicting a form of animal that is really made from human manipulation, and accompanying it with a kind of organic but manipulated sound that is running through a computer to add this inorganic feeling.
The biggest obstacle, that I feel will be the hardest to figure out, is the base of the structure; How big does it need to be? How to make it a cyclical track? How do I make it motorised? What materials should I build it out of? etc. These are all questions I need to research in order to answer, and this will be the part of the project that I will need to most support with. In order to help understand how to create this base I am going to talk to multiple different people at university, including the creative technology lab, the wood-shop as well as my tutors as I also need to figure out how include a speaker to play out the sounds I am making for it. Although this could become quite a complicated aspect of the project, I don’t feel intimidated by it, in fact I feel very excited to actually utilise the workspaces and professional help that LCC offers as I am yet to really explore these opportunities.
Why a zoetrope? – My specific attraction to zoetropes is due to the fact that both a physical piece of work, as well as an animation is produced from just one object. I have a wide approach to my art, involving multiple different practices that are able to interact with one another in a coherent way. I have a particular interest in animation, although having an extremely basic level of knowledge about animation, I have created multiple works involving stop motion (see below) which has in turn led to my continued interest in animation.
‘Oh! Sweet Innocence.’ – 2024 – A short mixed media film I made depicting how the experiences of childhood impact your individual evolution of character.
This set up involves two analog sensors; a pressure sensor (in my case 2), alongside a potentiometer, this set up involves controlling the amplitude of one signal using the other signal.
In the patch there is a signal generator at the top that is producing a sine tone (the carrier), this tone’s frequency is controlled by the first analog input, which in this case is the pressure sensor. As the pressure applied changes, the sensor outputs varying voltage levels that are allocated to different frequency values, allowing the pitch of the tone to fluctuate in response to how much force is applied. The carrier’s amplitude is modulated by another signal (the modulator), which is controlled by the potentiometer, the frequency of this signal can be adjusted to modulate at slower and higher rates, creating a rather beautiful tremolo effect.
Throughout this task I was constantly playing around the values of the signal to map the sensor’s range into a pitch range. Through changing these values I was able to control the sensitivity of the pressure sensor, the higher the first number, the more sensitive the sensor is. I was also able to control the frequency range meaning I was able to create these very different sounding tones through just changing one small part of the code. This made for an interesting task, as I was able to grasp a deeper understanding on AM synthesis through being able to control it’s properties to have a specific effect, now knowing how and why it is having that effect. When increasing the offset number (the bottom number) the entire pitch range moves upwards, and vice versa when decreasing the number, this is very useful for really manipulating your sound to achieve the low of high ends you want.
AM Synthesis with an external input.
The last section of the task involved using an external audio input to try AM on a real audio stream, for this I used existing music coming through my laptop to sample and add effects to. The AM added an interesting tremolo effect which the speed of, was controlled using the potentiometer. This was the first time using samples within Pd and I found myself feeling very inspired with the possibilities it offers. It gave me an insight into how I can integrate my work into Pd and this medium of code, it allowed me to understand how it can be used to manipulate existing sources (my own or someone else’s) to create something entirely new, in a interesting, generative way.
This is a brief example of adding an external audio using, ‘Embracing Catastrophe’ – Infinity Frequencies.
After completing the original task I decided to add a second pressure sensor and allocate it a different frequency range, in order to play and hear both sensors at the same time. (Can be seen in the video above). This made for an intriguing sound, almost harmonic at points, however weaving in and out.
Although this was not my first time learning about AM synthesis, this process has played a major part in my understanding of it, purely because of having this sequential, visual representation of the process. I am making each change consciously and am able to both see and hear how the sound is being controlled through my own choices and manipulation. This is one thing I have noticed about Pure data, and the tasks I have complete so far, it has really expanded my knowledge and understanding on concepts I have been slightly aware of before. Regardless of the level of prior knowledge, it has deepened my perception on this more kind of technical work, simply through stripping it back to basics and building it up, seeing how each small change effects the final product.
This task, specifically with the external input felt like the most complex one yet, and is still only very basic, however as I continue making each set up, I find there is more of a need for context around Pure data, which I thought I would find off putting, yet it’s quite the opposite. I have decided to choose this elective for my submission due to this new found inspiration. As I progress with each task, my confidence builds and I feel enthusiastic to combine my multi media skills within this project to make an intriguing final piece.
Prior to this module, the thought of Pure Data, and any kind coding in general, vastly intimidated me and I wasn’t particularly attracted to the idea of working with it. However since learning and understanding the basics of Pure Data, and the Bela board, I have a new found enthusiasm and desire to continue to learn the foundations of Pure Data. I want to expand my knowledge and work creatively, involving PD and the circuitry that accompanies it. I feel this is a really interesting opportunity to incorporate both my sound work with my film and physical art work.
DIGITAL INPUT
( Drum Synthesis. )
The images above demonstrate how to work with the digital inputs of Bela from Pure Data, using a button and an LED to create a simple drum machine.
To understand the mechanics of the button; there are two pieces of metal that are connected to each of the legs on the button. When the button is not pressed, the metal contacts aren’t touching each other and so the circuit is open. However, when the button is pressed the two pieces of metal make contact with one another, therefore completing the circuit and allowing the electricity to flow. In this case the button controls both the LED light turning on and off, as well as a sound occurring each time.
Above, in the left hand screenshot of code, you can see the Snare and Kick abstractions (abstractions are sub-patches that are saved as separate .pd files, to be continually used in other patches). When you press down on the button you hear the kick sound, and as you take your finger off it, the snare sound occurs.
In the picture on the right hand side is the code for playing different frequency tones from the same button, using the [osc~] object to generate a sine tone. By using the [sel 0 1 2 3 ] I was able to create sounds for each press, which triggered different frequency values every 4 counts. Hear below ….
As I became more confident with this code, I began adding more buttons, allocating different sounds to each button, some making the kick and snare sound and others playing different frequency tones. This allowed for multiple sounds to be played at once, creating a kind of drum machine, which was fun to play around with.
I found these opening tasks to Pure data and the Bela board very exciting and incredibly interesting to learn and work with as it is an entirely new concept that I have never experimented with before. As I have previously said, I had to no prior knowledge or interest in working with Pure data, however since completing these tasks, although very basic, I feel inspired and eager to make artwork using it. I have been able, and am still learning, to comprehend why and how the Pure data coding creates the effect it has through the circuitry and components used, and so I feel confident in continuing to experiment with it, in order to create a more structured and complete piece of work.
ANALOGUE INPUT
( Controlling pitch and loudness. )
The task following on from Digital Input was Analogue Input. -Using the analog input pins of the Bela, which measure real world quantities/ signals that change smoothly and vary continuously in time. Unlike digital inputs that have a distinct on or off state (a 0 or a 1), an analog signal can have any value within a given range. For example, using a potentiometer used to change the amount of resistance, therefore changing the voltage level.
Below is an example to portray the sounds created through Analogue Input, using a pressure sensor (or a force sensing resistor – FSR), a type of variable resistor that changes the amount of resistance based on the amount of pressure applied to it. Alongside the FSR is a potentiometer controlling the voltage.
This was my first time using these kinds of sensors that work by varying their resistance along side Pure data, (as the LDR is a resistor, however I was using that separately from the Bela). And, again, although basic, I immediately saw how having this level of control over the sound your manipulating allows you to do so much with it. I found it very fun that the harder you press on the pressure sensor, the louder the noise, as I have seen this used on many a hardware and so making it happen on such a basic level and knowing why it is happening was cool. This is one aspect of this module that I find really interesting, getting to understand how certain sounds are created, and why they’re occurring.
I feel I am consistently learning in this module, achieving something new each lecture and actually taking that information away with me and growing on it. Having repeated every task again at home, each time adding a new aspect to it to make sure I am expanding my knowledge and understanding. As a result, I am starting to acknowledge and comprehend the foundations of Pure data.
In the first session of Expanded Studio Practice, we began learning about components, using a breadboard as a means to practice circuitry without any permanence. Using a; 555 Timer ( an integrated circuit used for generating pulses and oscillations in electronic circuits), a light dependant resistor, a capacitor, and a battery – I was able to make a light-controlled oscillator. Meaning the more light shone onto the resistor, the lower the resistance, therefore, the capacitor charges faster and the oscillator’s frequency increases- causing a higher pitched tone to be heard. Then using an audio jack I sent the signal into an audio interface and out through headphones. Lastly I added a potentiometer, which essentially affects the foundational amount of resistance moving through the circuit. This allowed me to control the initial oscillation rate.
Following this lesson, I took the components home and continued to experiment with them. Using the same circuit (rebuilt), I then ran the breadboard through a Zoom 505 guitar pedal, which I was using to pitch shift the signal, and into my guitar amp- with the reverb turn up to max. This made for a much more interesting sound, containing a lot more depth and complexity. Along side the noise coming from this configuration, I was running my laptop through the amp of which I was playing ‘Globex Corp Vol.8 A1’ – (Dwarde & Tim Reaper) from. This was playing along side as a kind of tester as I want to create my own music to work with the sounds coming from the circuit, however this was a test run and a sound, I thought, worked very well with the signal noise. Using the flash on my phone, I recorded how distance affects the noise produced, demonstrating through both the movement of my phone and the movement of my hand, getting closer to the resistor even touching it at certain points. -Playing with the beat of the signal through changing the amount of resistance.
This was the first time I have worked with circuitry to produce sound and I found it incredibly inspiring, not only because I was able to produce a sound that is so malleable and free to work with, but also because it is something I have made with my hands from scratch. And therefore I am able to understand exactly why a sound is being produced and why it is able to manipulated. I found it a very satisfying task, in which I felt is possible to take in multiple directions to implement into my own practice. I am aware that this is only a basic level of circuitry, however I want to continue to work with this medium and I feel very enthusiastic to see what I will be able to create using it.